
Rediscovering the Lost Art of Building a Fire
The folklore of the hearth, the wood burning fireplace of Colonial times, permeates our psyche here in New England. A home without a fireplace lacks warmth even when the thermostat is turned up to the seventies. The colonial-era fireplace was the center of every family’s universe regardless of social stature. Heating, cooking, washing – both body and clothing – smoking, curing all took place on the kitchen hearth. Building a fire meant the difference between death and survival.
Regrettably, the art of building a warming, long lasting fire has disappeared. When the weather dips into the single digits, it is time to build a fire for warmth not atmosphere.
Throw out the grate, push the andirons to the side and build a perfect fire.
The single most important thing to remember when building a proper fire is not to allow any air to get underneath the logs. Air creates a roaring fire, which will send most of the heat up the chimney.
Attractive and exciting, a blazing fire wastes wood and needs constant tending. Only the embers in the fire throw out heat into the room. When air gets under the fire, wood burns quickly, brightly and on all sides. By preventing a draft of air from passing through the fire only the top surface and face of the wood will burn, creating a bed of glowing, hot embers which radiates a huge amount of heat into the room not up the chimney. Therefore, and this will probably drive some neat nicks crazy, it is necessary to maintain a bed of ashes on the hearth of the fireplace during the fire burning season.
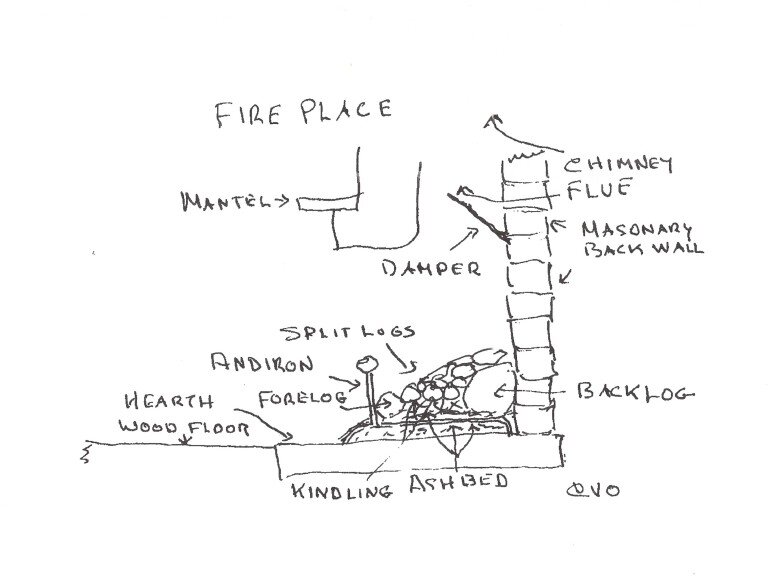
Here is my diagram for building a successful wood fire in your fireplace.
Iron grates, touted as essential for a wood-burning fireplace, were actually designed for burning coal, which needs air underneath to burn. Since few people burn coal any longer, my advice is to sell them for scrap.
Andirons were never designed to function as grates but rather to prevent round logs from tumbling out of the fireplace. Our andirons are handsome so I leave them in the fireplace, pushed to the sides. Because most firewood is split and doesn’t roll very well, the andirons are purely decorative. If using andirons, make sure to maintain the ash bed about an inch or two over the andiron’s legs. This keeps air from getting under the burning logs and to prevent the iron legs from being destroyed by the intense heat of the embers.
Once you have your ash bed, building a proper, long lasting fire is quite simple. Begin by placing a large log to the rear of the fireplace. This log, appropriately called the backlog, should measure eight to ten inches in diameter. (The traditional Yule log was an especially large backlog, meant to burn throughout the Holidays.) Since it rests against the rear wall of the fireplace and burns only in the front, the back log protects the fireplace wall from being burned out.
A perfect backlog will burn for many hours before having to be replaced. In our house we call backlogs ‘all day suckers.’
Next, place a smaller log toward the front just behind the andirons or placed where the andiron would traditionally be. This fore log, should measure four to six inches in diameter and should be pressed into the ash bed to prevent air from escaping underneath. Crumple some newspaper and place it in the trough created between the two logs. Then pile kindling on top of the paper. Depending on the quantity and the quality of my kindling I often use Fat Wood. This is resin-impregnated pine sticks. Two or three pieces help light the fire.
Or I may cheat by using chunks of Duraflame logs. One Duraflame log will help light twenty to thirty fires. Use a sharp knife to cut off two-ounce chunks. These are easily and safely lighten with a match. Place a few lighted chunks on the newspaper then top with the kindling then some smaller logs. This usually will get any fire going. When it comes to kindling get creative. Everything from shards from the bottom of the wood pile, twigs from my lawn, wine corks, spent candle nubs, broken up wooden crates, to waxed cardboard boxes which are used to ship wet vegetables will work. (Restaurants and grocers are happy to get rid of them.)
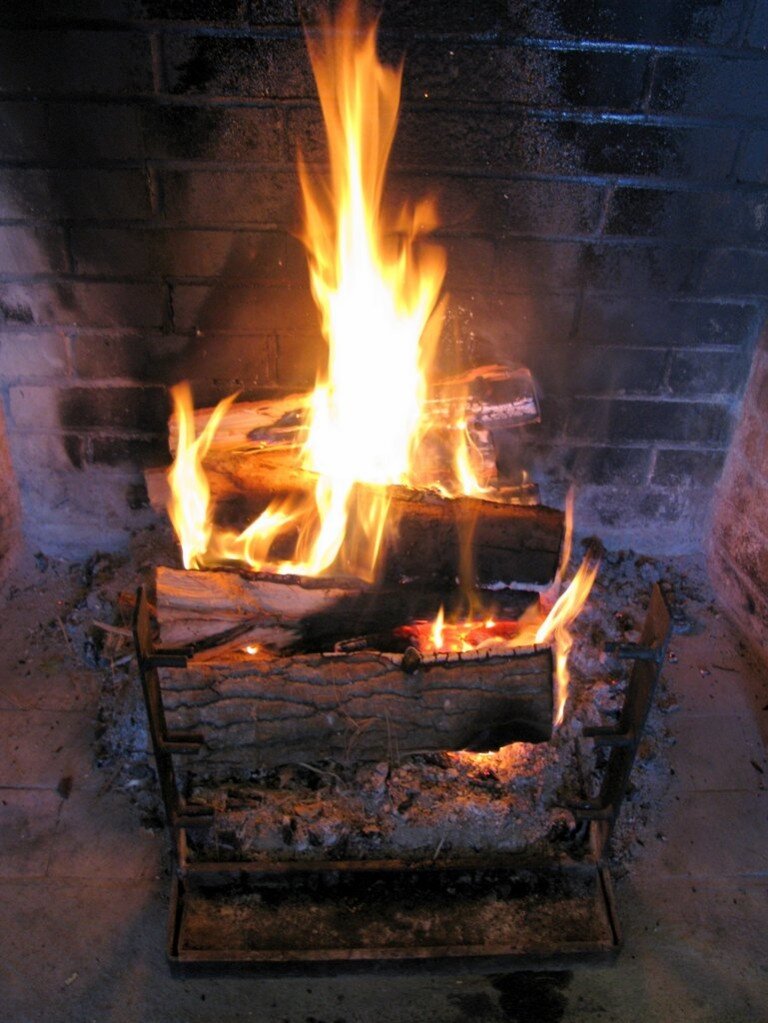
Don’t skimp with the wood when starting the fire. Skimp later once your perfect fire gets going. At that point all you need to do is to maintain the heat produced by the accumulation of red-hot embers on the ash bed. (A roaring initial fire will produce a sufficient amount of embers to really start heating up most rooms.) At this early stage there will be some spectacular flames shooting up as though a house were burning down. These high flames may look great but they actually throw out very little heat. Once the ember bed is established the flames will calm down, rising no more than a few inches above the logs.
To maintain a proper fire, feed it from both the front and the back. A good pair of sturdy fireplace tongs is indispensable for this work.The largest log, always placed against the back wall, will burn the longest. When it has burned down and shrunk in size, pull it toward the front. Replace it with another large log. The rest of the time your feed replacement logs from the front. As the ember mass begins to burn down simply push the fore log back over the embers and replace it with another log or two depending on how far the fire has burned down.
One way to judge the quality of your fire is to watch it. If the flames are too high, air is probably getting underneath the logs. You are losing heat. To correct this, jab the logs with your poker knocking them downwards towards the ash bed which by this time should be covered with burning embers.
Always remember to keep the backlog higher than the other logs. It is the burning embers on the face of the backlog that throws the heat out into the room.
By building the fire in this manner, you will be sending the heat into the room not up the chimney.
If your fire is still going when you go to bed and you wish to have a fire in the morning, you can dampen the fire by covering the embers with ashes gathered from the sides of the fire. In the morning, scrape the ashes back to the side. Place new wood on the preserved embers. This really works. I’ve done it a hundred times.
Safety Tips for Wood Fires at Home:
Never leave a fire unattended without placing a screen in front of it.
Open fireplaces that burn wood are inherently dangerous. This is because it is hard to judge how different logs will burn. Every once in a while you will hear a crack or a pop accompanied by a chunk of ember flying out beyond the safety of the stone hearth. While these little embers are usually harmless and can be easily brushed back on to the hearth they are capable of starting a smoldering fire if they land on some flammable material and are not immediately attended to.
Keep your chimney clean.
Chimney fires, while rather infrequent, can be frightening and even result in burning down your home. Schedule an annual fireplace inspection with a chimney sweep. They’re usually quite reasonable and can advise you on how often you need a cleaning based on how frequently you build fires.
Use the proper wood in your fireplace.
Well-seasoned hard wood such as oak, maple, walnut, birch and fruitwoods such as apple and cherry throw out the most heat. Ask your fire wood guy. They are usually very knowledgeable.
Don’t burn evergreens even if they are free for the taking. Pine creates little heat and throws off creosote when burned, the number one cause of chimney fires.
The joy of building a proper fire can be immense. You may even find yourself mesmerized by its warm glow instead of the television or computer screen.